Server administration
This page is to be used a reference for common tasks in administration of an ISCAN server. The workflow for many of these are not currently as streamlined as they would ideally be.
Updating ISCAN and PolyglotDB
As ISCAN and PolyglotDB are both under active development, updating to the latest version is necessary to fix issues that
crop up. To perform an update for the Docker version, run following command from the root of the iscan-spade-server directory:
./update.sh
Which will then fetch the latest changes from the GitHub repositories of both packages. If it generates a permissions error,
run chmod +x update.sh and rerun the above command.
For the non-Docker version, updating the ISCAN and PolyglotDB packages can be done via the following command from
the root of the iscan-spade-server repo:
pip install -U -r requirements.txt
Getting a tutorial corpus
At the moment, ISCAN hosted on https://roquefort.linguistics.mcgill.ca uses an aligned version of ICE-Canada corpus. However, this tutorial corpus is not distributable currently, so we plan to make another one based on a subset of LibriSpeech available in the near future. For the purpose of adding tutorial corpora for each user to run through tutorials, any smaller corpus aligned using the Montreal Forced Aligner will work once renamed to spade-tutorial and added to the system.
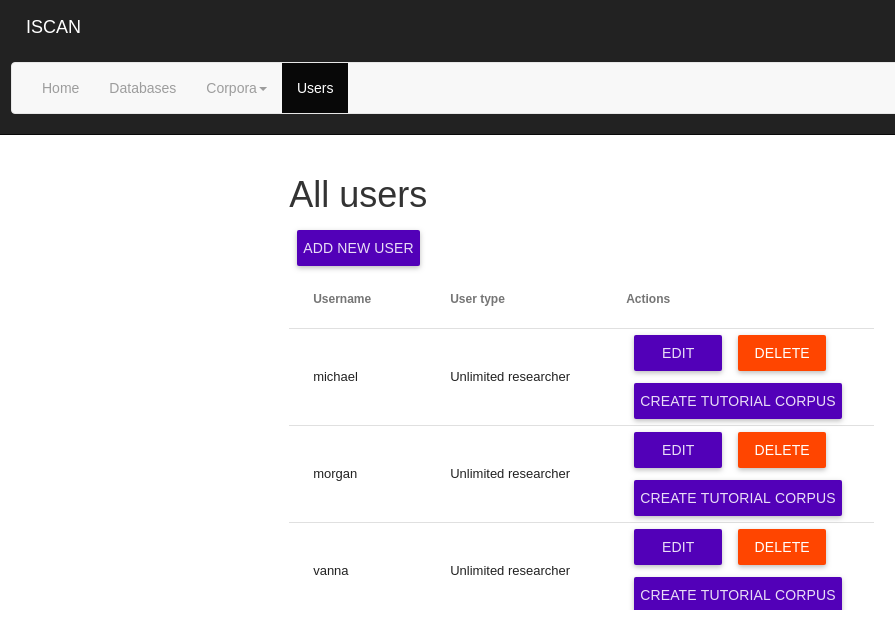
For ISCAN hosted on https://roquefort.linguistics.mcgill.ca, site administrators can create tutorial corpora from the new User View, by going to Users in the navigation bar directly in ISCAN.
Adding new corpora
To add any new corpus, simply put its folder in the polyglot_source directory (see Mounted volumes for its location
in the Docker installation). When not using Docker, this is configuration setting in the local_settings.py of the Django
configuration (SOURCE_DATA_DIRECTORY in the non-Docker Installation).
Once the corpus is in the directory, performing a reload on the home page of the ISCAN server will update ISCAN’s records of databases and corpora. If the corpus does not use forced aligned TextGrids as transcripts, then the corpus format will have to be changed in the admin page (i.e. go to https://hostname.com/admin/iscan/corpus/, select the corpus and select the appropriate supported format from the Input format dropdown).
Supported formats
The primary supported format is the output TextGrids from commonly used forced aligners:
In addition, the following formats are supported as well:
- TextGrid output from LaBB-Cat
- BAS Partitur formatted files
- Buckeye Speech Corpus
- TIMIT
In regards to how the corpus should be structured, where possible files should be divided into speaker directories. If the force aligned TextGrid has speaker information (i.e., word and phone tiers for multiple speakers), this is not necessary.
Creating and Modifying Users
User creation and permissions editing can be done in two ways. As previously, everything can be done throught the Django admin interface (i.e., https://hostname.com/admin/auth/user/). Alternatively, there is now a method for superusers to access this through ISCAN directly, by selecting the Users tab in the navigation bar.
In the Users View, a user with administrative permissions can choose the ‘Add New User’ button to add a user with any role (roles explained below).
User Permissions
When creating a new user, you can choose whether to grant the following permissions:
- Can edit: allows the user to edit and correct aspects of the corpus data, such as acoustic measurements like pitch/formants/ tracks or time boundaries of segments/words (this functionality is currently not implemented in ISCAN)
- Can annotate: allows the user to add their own annotations to linguistic items, within an annotation framework specified in the admin interface (this functionality isn’t fully featured yet, and has primarily only been implemented for annotating utterances)
- Can view annotations: allow the user to see annotations in the corpus
- Can listen: allows the user to play audio on the corpus detail page
- Can view detail: allows the user access to the query detail view, otherwise the user can query but not see the full context of each result
- Can enrich: allows the user to create/run/reset/delete enrichments
- Can access database: allows the user to start/stop the database for this corpus
User Roles
Some predefined user types are available to easily create new users with the correct permissions.
- Guest These users have permissions to query any public corpora. They have no other permissions, and they cannot query any restricted/private corpora.
- Annotator These users have permissions to query, view detail, listen, and add annotations to all public corpora. They do not have database access, permission to enrich corpora, edit, or view other annotations.
- Researcher These researchers have database access, permission to enrich and query all corpora. Additionally, for public corpora only, they can view detail, edit, listen, and view annotations. They do not have permission to add annotations.
- Unlimited researcher These users correspond to what we otherwise call superusers. They have all permissions for all corpora, as well as database access and administrative permissions. This is reserved for McGill internal team members.
In addition to these predefined roles, individual permissions can all be edited manually in the User View by finding the user and selecting the Edit button in the Actions column. More specific per-corpus permissions can be given to uses through the Django admin interface as well (i.e. https://hostname.com/admin/iscan/corpuspermissions/).
Enable running of SPADE scripts
Warning
This feature is experimental and may not work reliably. Particularly, the way corpora are created via script does not interact with the rest of the ISCAN ecosystem, so these corpora cannot be viewed in the web browser.
Running SPADE scripts is an optional functionality in ISCAN. This allows users to run scripts which automatically do all necessary enrichments and output a specific CSV for a given corpus.
In order to set up SPADE scripts, you must first enable SPADE scripts running, by changing SPADE_SCRIPTS_ENABLED to True in setings.py.
Then you should clone the SPADE script repository.
The path to this repository must then be set in settings.py as SPADE_SCRIPT_DIRECTORY.
For the ISCAN Docker repository, the SPADE repo should be cloned in the directory directly above iscan-spade-server.
If you also have access to the UNISYN SPADE respository, you should put it in the same directory that you put the SPADE script repository as well.
Necessary SPADE repo changes
auth_token
Since the SPADE scripts are ran as a subprocess of the SPADE server, it is necessary to provide a token for permissions.
Using the ISCAN Docker repository, this can be done by runing ./generate_token.sh USER where USER is the username of an admin account.
This will create a file called auth_token which must be put in the SPADE script repository.
Installing corpora for SPADE scripts
Once a corpus has been put in polyglot_source, you must update the paths in the config.yml file for that corpus in the SPADE scripts repo.
If you are using the docker installation with default settings, this can easily be done by switching to the docker-paths branch of the SPADE scripts repo.
This will also set the IP in common.py for Docker.
Feel free to delete any directories for corpora that you do not have access to. This will prevent users from running scripts over corpora that do not exist(which will naturally cause errors).
Installing new scripts
To install a new script, simply put it in the SPADE repository. This must be done by an administrator by hand for security reasons. The script should output a CSV in the corpus that it runs over.
Reporting errors and issues
Some issues can be worked around in the admin interface. For instance, running an enrichment locks the corpus as busy,
which can cause issues with rare exceptions during their running to cause the corpus to become locked. This busy status
can be fixed by changing this property on the admin page for that corpus object.
Additionally, databases can be reset to their original non-imported state by deleting the database on the admin page for databases (i.e., https://hostname.com/admin/iscan/database/).
If any issues are encountered, please post them along with the exception message found either in the runserver window or the celery window to the GitHub issues page.